Tuesday, March 3, 2015
Monday, March 2, 2015
Cab-cage attempt 1
I also tried cm-handmade's cab cage with size 10 thread. Instructions here: The stone I used is a 3-inch brecciated red jasper donut. I got it in a wonderful haul of second-hand beading supplies.

Have a wicked awesome day!
- Jo

Have a wicked awesome day!
- Jo
Sunday, March 1, 2015
Tatting of a Sunday
Tried my hand at Corina Meyfeldt's tatted flower, using mystery thread from my second-hand beading haul and some red beads, from same.

I love how it turned out, even if tatting with beads is still cumbersome. How do you keep those beads tucked a few turns back on the shuttle, out of the way, yet still within reach when you need them?!? I am slowly getting the hang of it...
Have a wicked awesome day!
- Jo

I love how it turned out, even if tatting with beads is still cumbersome. How do you keep those beads tucked a few turns back on the shuttle, out of the way, yet still within reach when you need them?!? I am slowly getting the hang of it...
Have a wicked awesome day!
- Jo
Thursday, February 26, 2015
Tatted Earring #1
This from today's tatting design sesh...a large dangle earring, pattern by yours truly. It was the second attempt. I am learning tatting design by trial and error, which is not the easiest. I am happy Ieft some bare picots. I really love the look of the sparkly beads to either side and at the bottom! I think on this design, less is more when it comes to beading; this lets the lace really shine. :)

Should I make the second earring??? I am not a large earring person but I could see me wearing these!!! And since they're lace, they are feather-light! (No stretching of the earring holes!!)
Have a wicked awesome day!
- Jo

Should I make the second earring??? I am not a large earring person but I could see me wearing these!!! And since they're lace, they are feather-light! (No stretching of the earring holes!!)
Have a wicked awesome day!
- Jo
Friday, February 20, 2015
A Bunch of Tatting Projects!
I have been tatting up a storm ever since I joined the Facebook group called Beginner Tatters Chat Group. I have learned a gajillion things, but the most important are:
1. Buy self- threading needles to hide the ends. No, don't think that your needles and threaders can be bent to the task. Just do it. They cost next to nothing and they work like a charm!!!
2. Two rows of a doily can be worked together with a bit of planning. Say the round you are working on is followed by a round of individual motifs. STOP the round you're working on! Work the motif round first, connecting them, then resume the round you stopped, tatting the motif round on as you go! Oh the beautiful genius of this plan. Too bad I didn't know that a round sooner!

This is Doily 1 from Jan Stawasz' book, Tatted Treasures. Only 21 more stars left to go! :/
3. There is so much I don't know, it's going to take forever to master this craft! Front-side/back-side tatting, Lark's Head Joins (and when to do them!), split chains, the list goes on and on... At least now I have resources I can turn to for my endless questions! If you're new to tatting, please consider joining Beginner Tatters Chat Group on Facebook. You won't find a more supportive group of tatters!!! Well I am sure they are supportive in forums everywhere, but I have been made to feel so welcome, I just had to give a shout out! :)
Have a wicked awesome day!
- Jo
Saturday, February 14, 2015
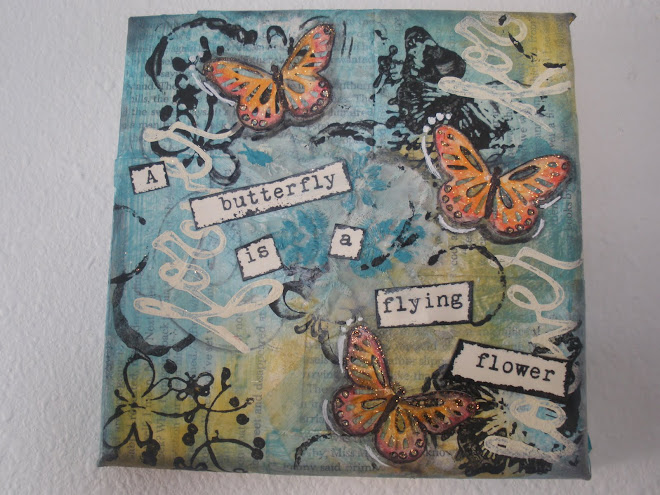
A New Work in Progress
A large canvas has been staring at me from the windowsill, where it has acted as a blind, for months now...and despite my trepidation at its size, I think it is time to let it sing!
It looks welcoming on my easel... Big. White. Blank. This marvelous canvie is 22 x 28 inches of pristine emptiness. I can't let it scare me. I have a plan for it, one that needs a super bold background. With the layers I plan on adding, I wanted the brightest colors that clamor to be used. Here is a taste of what has transpired so far!

Have a wicked awesome day!
- Jo
Friday, February 13, 2015
Tatting an edging
I started tatting an edging for this tablecloth this week. I have been messing around with hens and chicks patterns, ever since Carol (sunset) introduced me to it as a beginner pattern last week. I am so glad I got this thread in size 10!!! It's DMC Cebelia brand, and the color is simply stunning! The hanky/cloth is a large square, about eighteen inches wide. I can't take credit for the pattern. I got the stitch count for the rings (4-4-4-4, 4-4, and 4-3-2-2-3-4) from Tatman's free hens and chicks tatted cross pattern, which can be found if you search the web. I apologize, I couldn't find the link or I would post it here! Then I just experimented with the length of bare thread required until the motif would lay the way it should, with just the right tension. If you make the bare thread too short, it wants to fold over on itself; too loose and it sags. Here is a picture of the progress I have made so far:


With Carol's help I was able to design a corner motif that more or less goes with the rest of the pattern to be able to turn the corner on the tatted edging. The key pointers she gave me were
1. Keep the rings or stitch counts as consistent with the hens and chicks pattern
2. Add two tiny rings to help bridge the gap from the last hens and chicks motif to the corner motif, and from the corner motif to the first hens and chicks motif on the next edge
3. How much to leave for the bare thread gap will come instinctively. I didn't quite believe this at first, but sure enough, I found that I was able to intuit about how much thread I would need!
Hopefully next time I post, this little tablecloth will be gracing my tatting vignette at Keep Me In Stitches here in McCall!!! More on that later.
Have a wicked awesome day!
~ Jo
Subscribe to:
Posts (Atom)